
Making activity sets for flannel boards or magnetic boards is easy and fun. With just a few simple materials, you can make these activity sets yourself, or your children can make their own. The possibilities are limitless and can be easily adapted to either type of board.
There are two primary ways to make activity sets. Method #1 is for those who prefer to use ready-made illustrations. Method #2 involves drawing your own from scratch.
Method #1
You will need:
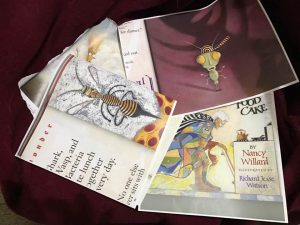
- Book or magazine (the examples are from Squids Will be Squids and The High Rise Glorious, Skittle Skat Roarious, Sky Pie Angel Food Cake)
- Scissors
- Magnetic sheets with adhesive backing (for magnetic board only)
- Stiff fusible interfacing (for flannel board only)
- Velcro fasteners (for flannel board only)
- Glue or spray adhesive (for flannel board only)
- Laminating sheets (optional)
Step 1: Choose the book or magazine you’ll be working with.
Step 2: Copy the pages with the figures you want to use.
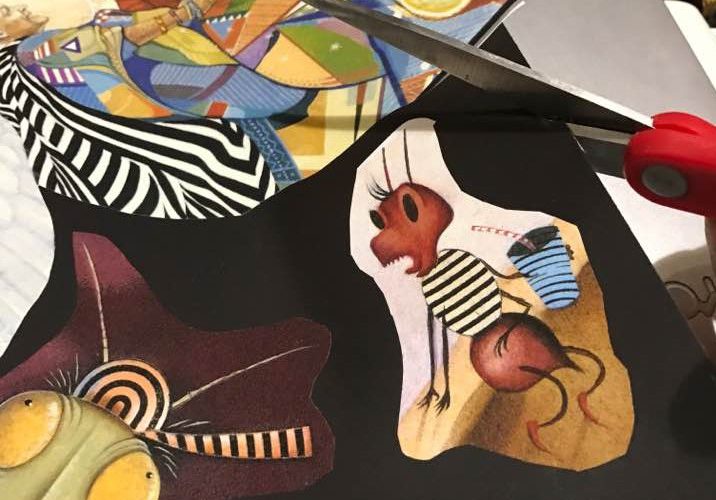
Step 3: Cut out figures and props. Be sure to leave a border around the edge of the figure. This will make it easier to cut out once it’s mounted.

Step 4a: If using a magnetic board, affix to magnetic sheets. The magnetic sheets have adhesive backing. You may be able to find them at your local art or office supply store, or you can get them here.

Step 4b: If using a flannel board, affix the figures to fusible interfacing (available at fabric stores; stiff interfacing works best). You can use fabric glue or spray adhesive. Plain Elmer’s Glue will work but may not be as durable.
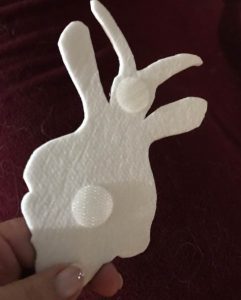
Step 5: Cut out the figures again. You can cut them a little closer this time, but for very thin parts, like insect antennae, you may want to leave a bit of border.
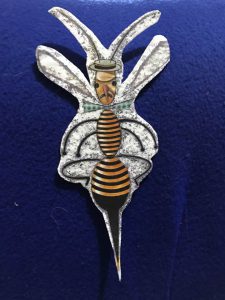
Step 6: Laminate for protection, if desired. You can get laminating sheets at most office supply stores, or you can order some online.
Step 6: Add Velcro fastener (or other sticky-back hook-and-loop fastener) to back of interfacing if needed. Be sure to use the side of the Velcro fastener with the hooks. It’s the piece that feels roughest to the touch. You can get Velcro fasteners at most fabric or craft stores, or you can order some online.
Method #2
If you’re artsy, or if your child likes to draw, you can make your own original sets.
You will need:
- Stiff fusible interfacing
- Choice of drawing and coloring tools: e.g., colored pencils, permanent fabric markers, fabric paint, etc.
- Scissors
- magnetic sheets with adhesive backing (for magnetic board only)
- Velcro fasteners (for flannel board only)
- glue or spray adhesive (for flannel board only)
- Laminating sheets (optional)
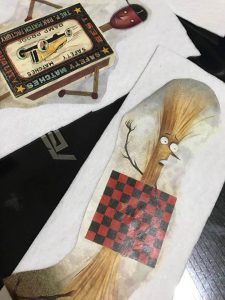
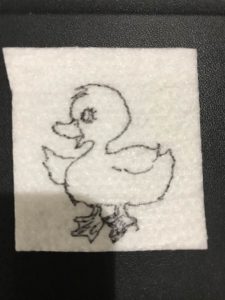
Step 1: Draw the figures and props you want onto the fusible interfacing.
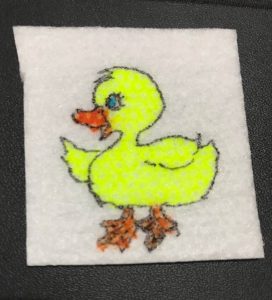
Step 2: Color with permanent fabric markers, or use colored pencils and spray with fixative to prevent smudging.
Step 3: Cut out figures and props. If you’re planning to use the figures on a magnetic board, be sure to leave a border so it will be easier to cut out once the magnetic backing is attached.
Step 4a: Affix to magnetic backing (as above) or add Velcro fastener to back.
There you have it. Soon we’ll be adding some free downloadable patters for activity sets, along with links to commercial sets you can purchase if you prefer.
This is a clever project for kids. It’s nice to see a project where kids can use their creativity without the use of a computer. The simplest things are often the best. Thanks for sharing this project. Do you happen to have a project for a 14 year old?
Hi, David. Funny you should mention 14-year-olds. My next few (upcoming) posts involve activities for older children. I have some coming up for writing and some for art. What is your teen interested in?
She lives and breathes Dance (ballet, tap, jazz, hip hop, and modern).
I love dance. I did modern in college and jazz, tap, and ballet when I was in my twenties. Now I do ballroom.
I’ll see what I can come up with for a young dancer. :o)
This is really nice, in a world full of technology children need to learn to be creative and use their hands to develop other skills that with cell phones and tablets can not do. This is so useful.
Thank you, Ericka. You’re so right. It’s so important for children to develop both imaginations and fine motor skills. It helps build their brain power in a lot of different ways.
I like the idea. So much so that I am going to try or on my vision board to the visual I look at for motivation pop out at me. I do have grandchildren who could benefit from this as well. Maybe we could do a dual project, he pick his pictures and I will pick mind. Thanks for sharing.
That’s a great way to think outside the box, Maurice. I know you and your grandchildren will enjoy the activity and your unique spin on it!
This is an interesting project. I have a small baby but I’m bookmarking this. I was thinking some days back, what will I do with the Flannel blankets when baby gets older. Now I know how to utilize them. Thanks for sharing this cool idea.
What a great idea, Demi. That’s something your child will doubly cherish.
By the way, I’m starting a companion blog called Baby Books and Learning (babybooksandlearning.com) next week. I hope you’ll check it out. How old is your baby?